Do-it- yourself Gas Tank Rust Removal


Ever look inside the gas tank of an old motorcycle and see nothing but rust? It’s really common and there are products out there to either get rid of the rust or supposedly coat and seal the tank. Well, maybe, but, since a chemical reaction caused it, why not reverse the whole process and really get rid of it?

I was flipping through the pages of the latest Motorcyclist Retro and found an article showing the straightforward process of electrolysis using a battery charger, washing soda and a bit of wire. You combine the simple ingredients, fill the tank, insert the wire anode, turn on the current and let the fun begin. A couple of days later, no rust if you’rethe type of guy who likes to restore old bikes, next time you run into a rusty tank, give this a shot and see how it turns out. It works on smaller individual pieces, too. 


Enhanced by Zemanta

LEOVINCE SBK SILENCER PACKING MAINTENANCE AND REPLACEMENT


The products of the SBK range utilize thermally and mechanically resistant fiberglass wool, but
due to the nature and function of the silencer itself, they are liable to wear.
As described in paragraph 3.00 of the General Guarantee conditions in the booklet
accompanying every LeoVince system, regular maintenance must be performed on the silencer
(muffler) packing.
It is necessary to periodically check the integrity of the packing material. This can initially be
done by listening for excessive exhaust noise. If the exhaust tone is uncharacteristically loud or
metallic/hollow sounding, most likely the packing needs to be replaced. The average duration of
the packing material obviously varies according to the load applied, riding style of the user and
engine size and configuration. For example, a large single or twin cylinder bike will tend to
require shorter packing intervals than a 4 cylinder bike of the same displacement. That being said
it is not uncommon for singles and twins to go 15k miles between repacks and 4 cylinders to go
20k or more due to the high quality dense packing used in LeoVince SBK products.
If the packing material is found to have deteriorated, it should be replaced before this
deterioration affects the heat insulation properties towards the exterior of the silencer. If this is
not done, in time there can be a risk of damaging the carbon mounting brackets/ silencer sleeves
and possibly body panels/fairings on the motorcycle.
NOTE: The replacement of the muffler packing must be done exclusively with original
LeoVince spare parts and by following the assembly instructions provided in the pack.
INSTRUCTIONS FOR REPLACING PACKING MATERIAL INSIDE LEOVINCE SBK
SILENCERS
1. Make sure the silencer is at room temperature before beginning work, and remove the
silencer from the exhaust system and motorcycle.
2. Using a 7/32 drill bit (preferably cobalt or titanium coated) drill the rivets out of the front
end cap only.
3. Slide the silencer sleeve and rear end cap off as one piece and remove the old packing
material wrapped around the mufflers core. Be sure not to remove the steel wire mesh
tube around the silencers core as this will be re-used.
4. It is also recommended to drill the rivets out of the rear cap and remove it from the sleeve
as well to help facilitate the final re-assembly of the silencer later.
5. Proceed to wrap the first layer of packing material around the muffler core (perforated
metal tube). This material is shown on the right in the first photo and marked with a
number “1” (Your SBK repack contains 2 layers of packing material number “1”). In
order to achieve the correct balance between duration and noise level it is essential to not
put too much pressure on the fiberglass wool while wrapping it around the perforated
core.
6. Next, wrap the second layer of packing material around the perforated muffler core (same
as the first layer). Again, be sure not to put too much pressure on the material as you
wrap it, as it does not need to be excessively tight.
7. Trim off any packing that protrudes past the end of the perforated core and secure the
whole assembly using masking tape. Be sure to wrap the tape all the way around the
circumference so that it does not come loose.
8. Repeat the same procedure (steps 6-7) with the glossy outside layer of packing material
(material labeled number “2” from the first photo. Make sure the more glossy side of this
layer is facing the outside.
9. Re-assemble the silencer by sliding the muffler sleeve over the core assembly and reinstalling
the end caps (remember to re-install the carbon fiber end cap on Factory
mufflers that are so equipped). Line up the rivet bands over the rivet holes, over-lapping
the final two holes of each band and rivet both the front and rear ends of the muffler. To
avoid the risk of any leakage or wear of the rivets, we strongly recommend using the
LeoVince spare parts rivets (sold separately with the rivet straps) as they are made from a
high quality 304 stainless steel.

Enhanced by Zemanta

How to Clean Motorcycle Brakes

Motorcycle brakes
just like other parts on motorcycles, can become dirty and covered with oil, grease and other residue. However, for any kind of decent performance, motorcycle brakes must be very clean. So, it is important to quickly and effectively clean these pieces of equipment without damaging them.


Pull the motorcycle to an open, accessible area (preferably a lawn), and place the motorcycle on a jack stand or center stand. If you do not own one of these stands, try placing the bike on a large block or similar device.


Use a flat-head screwdriver to pry apart the brake pads in the brake assembly. Dip a rag in a bucket of hot, soapy water and use it to begin scrubbing the brake disc. The disc is easily accessible just to the side of the tire, and you can access the disc area within the brake pads by turning the wheel.


Slide the rag between the brake pads. Make sure to get them as clean as possible.


Use a sponge with a scrub side to scrub grime and grease off the surface of the brake disc. Again, spin the tire to access the portion of the disc that is between the brake pads and within the assembly.


Hose the entire braking assembly. It is important that no soapy residue is left on any surfaces of the brake, as it will cause slipping.


Leave the brake pads spread apart for several hours so they can dry.
Enhanced by Zemanta

How to Repair Small Engines part1-Small Engine Basics

English: Animation of a 4-stroke engine showin...Image via Wikipedia


Small gas engines serve us in many ways. They power lawn mowers, tillers, cultivators, trimmers, edgers, snowblowers, chain saws, pumps, generators, air compressors, and other useful home tools. They also power our fun: outboard boats, snowmobiles, motorcycles, all-terrain vehicles, ultralight aircraft, and other toys. To keep them operating efficiently, an owner of these tools and toys should know about small engines: how they work and what to do when they don’t.
Small gas engines are made up of individual systems that work together to produce power. Each system has many components. Internal combustion gasoline-powered engines require six systems: fuel, exhaust, ignition, combustion, cooling, and lubrication. In this article, we will discuss the systems and components that make small engines work.

Fuel and Exhaust

The fuel and exhaust systems are critical to operation. They furnish the fuel for combustion and remove exhaust gases. The following are components of a fuel and exhaust system.
Gasoline: Gasoline is a combustible liquid that burns relatively slowly. However, when sprayed as a mist and mixed with air, it is quite explosive. All it needs is a spark. Two-stroke engines require that oil be mixed with the gasoline to lubricate internal parts. Four-stroke engines use a fuel-air mixture.
Fuel Tank: The fuel tank stores fuel in preparation for mixing by the carburetor and use by the engine. Some fuel tanks are pressurized with air to help deliver fuel to the carburetor. Other tanks are non-pressurized and depend on a fuel pump to deliver fuel to the carburetor.
Fuel Line: Fuel is moved from the tank to the pump and/or carburetor through a fuel line. Pressurized fuel systems often have a squeeze bulb in the fuel line for building pressure.
Filter: A carburetor jet has a small opening that can easily become clogged. A fuel filter traps dirt and sediment from the gas before it is delivered to the carburetor.
Pump: A fuel pump produces a vacuum that pulls the fuel from an unpressurized tank, then delivers it to the carburetor.
Carburetor: The carburetor has one job: to mix the correct proportion of gasoline and air for the engine. Too much gasoline in the mixture makes it rich; too little gas makes it lean.
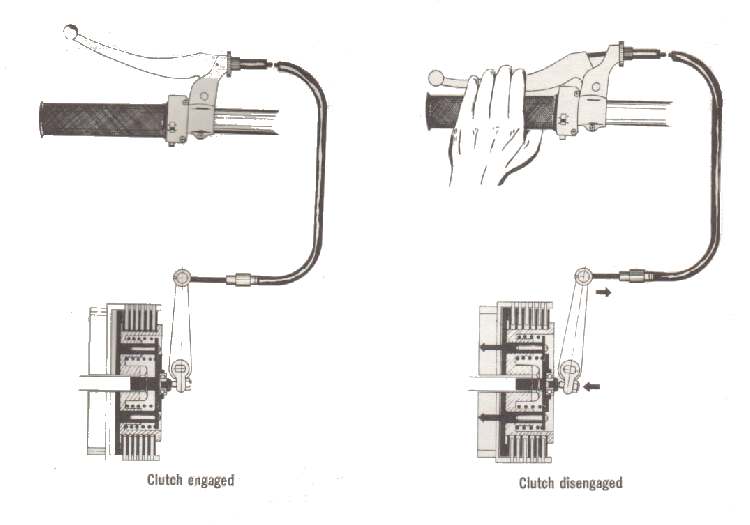
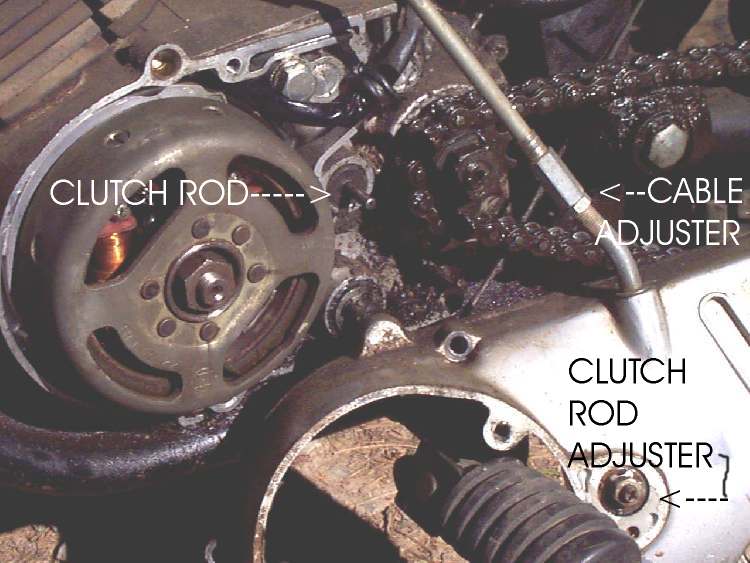
Throttle: The throttle controls the amount of fuel-air mixture that enters the engine from the carburetor. The throttle thus controls the speed of the engine.
Primer: A primer injects a small amount of gasoline into the carburetor throat to make the initial fuel-air mixture rich. A primer is used to help start a cold engine.
Choke: Some engines control the richness of the fuel-air mixture at startup by controlling the air rather than the fuel. A choke reduces the amount of air in the fuel-air mixture.
Governor: A governor is a device that automatically opens the engine’s throttle when more power is needed and closes it when the load is light.
Muffler: Small gas engines, especially two-stroke engines, are noisy when they operate. A muffler reduces the sound of the exhaust gases by passing them through baffles.
Spark Arrestor: A spark can exit the exhaust port of a small gas engine, potentially starting a fire on nearby combustibles. A spark arrestor on the exhaust port can reduce the chances of such a fire. Spark arrestors are especially important on chain saws, motorcycles, and all-terrain vehicles operated in dry woodlands.

Ignition

The ignition is a primary system within all small gas engines. It produces and delivers the high-voltage spark that ignites the fuel-air mixture to cause combustion. No spark means no combustion, which means your engine doesn’t run. Below are the components found in small engine ignition systems. Some systems will include breaker point ignitions while others depend on solid-state ignitions.
Magneto-Powered Ignition System: A magneto uses magnetism to supply electricity in ignitions where there is no battery. The magneto is turned by the crankshaft, which rotates when the manual recoil starter is pulled. The three types of magneto ignition systems are mechanical-breaker, capacitor-discharge, and transistor-controlled.
Battery-Powered Ignition System: If your small engine includes a battery for starting, the ignition coil will also use it to supply spark to the spark plugs. A battery stores electrical energy until needed. Battery ignition systems also use mechanical-breaker, capacitor-discharge, and transistor-controlled ignitions.
Mechanical-Breaker Ignitions: High-voltage electricity must be sent to the spark plug at the appropriate time. In mechanical-breaker ignitions, this job is performed through the contact points and a condenser.
Points: As the crankshaft rotates, a cam opens and closes a set of contact points. These points function as an on/off switch: Closed is on, and open is off.
Condenser: Because the spark moving across points can damage their surfaces, the condenser stores voltage to reduce arcing between points.
Capacitor-Discharge Ignitions (CDI): A capacitor is a large condenser. A CDI stores and delivers voltage to the coil using magnets, diodes, and a capacitor
Transistor-Controlled Ignitions (TCI): Transistors are electronic controllers. A TCI uses transistors, resistors, and diodes to control the timing of the spark.
Coil: An ignition coil is simply two coils of wire wrapped around an iron core. The coil changes low voltage (6 or 12 volts) into the high voltage (15,000 to 30,000 volts) needed by the spark plug.
Spark Plug: A spark plug is an insulated electrode that is screwed into the top of the engine cylinder. High-voltage timed electricity from the magneto travels by wire to the spark plug. The base of the plug has an air gap of about 0.030 inch (30 thousandths of an inch), which the current must jump.
Wires: The primary wire from the coil to the breaker point and secondary wire from the coil to the spark plug(s) deliver electricity to the ignition components.
Distributor: A distributor is an ignition system for engines with more than one cylinder and spark plug. It distributes the spark to the appropriate cylinder using a rotor, cap, and individual spark plug wires.

Combustion

The combustion system of a small gas engine is where the work gets done. Components of the combustion system include the cylinder block, cylinder head, camshaft, valves, piston, connecting rod, crankshaft, timing gears, and flywheel. To better understand small gas engines, let’s look at how this vital system works.
Cylinder Block: The largest single part in a small gas engine is the cylinder block. It is a piece of metal in which the cylinder hole is bored or placed.
Cylinder Head: The cylinder head is the top, or ceiling, of the cylinder and is attached to the block with bolts. Depending on the type of engine, the head may or may not include valves.
Piston: A piston is the movable floor in the combustion chamber. Its upward movement compresses the fuel-air mixture. After combustion, its downward movement rotates the crankshaft.
Crankshaft: An engine’s crankshaft is a metal shaft with an offset section onto which the connecting rod is attached. Rotation of the crankshaft moves the piston up in the cylinder. Movement of the piston down in the cylinder then rotates the crankshaft.
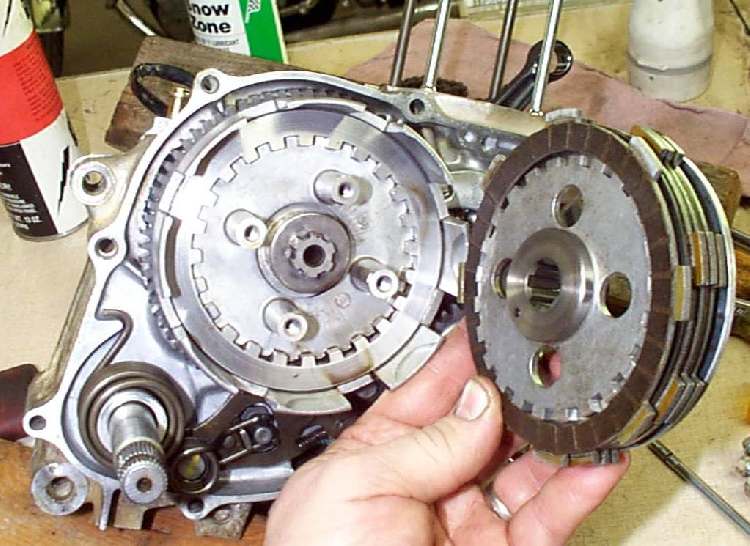
Connecting Rod: Between the piston and the crankshaft is a connecting rod. At the larger end of the connecting rod is a bearing that allows rotation around the moving crankshaft. The small end is attached to the piston pin.
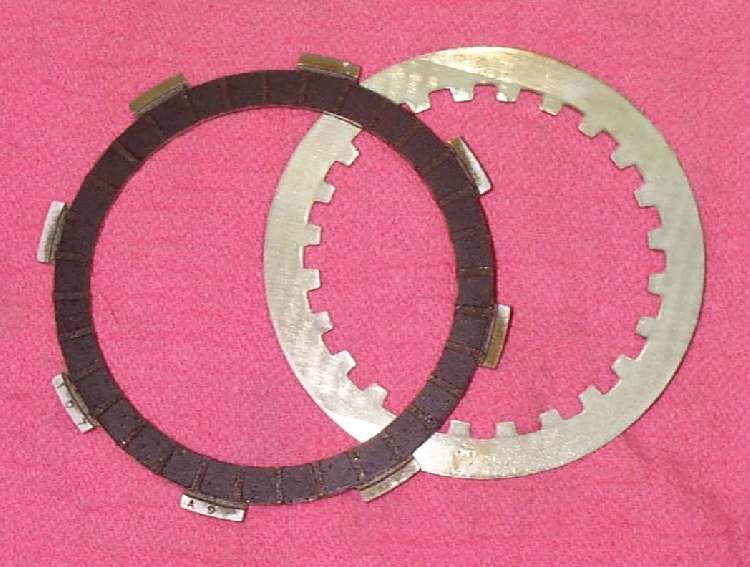
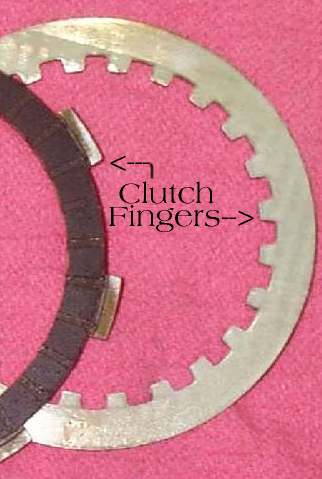
Valves: Valves simply open and close passages. A reed valve in a two-stroke engine is activated by changes in air pressure.
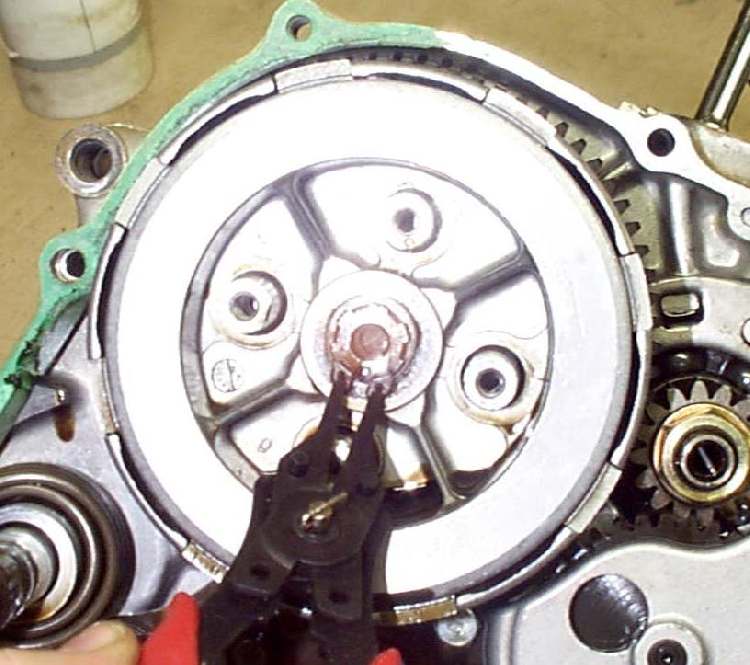
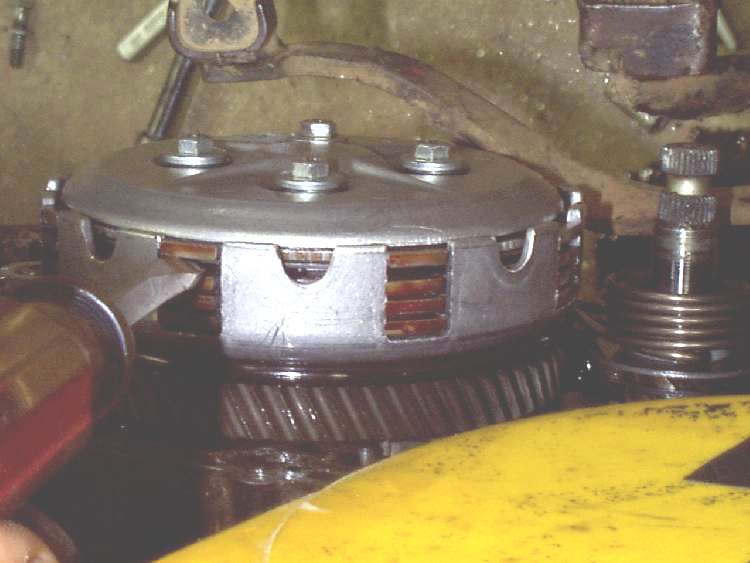
Flywheel: At the end of the crankshaft is a circular weighted wheel called a flywheel. The flywheel delivers the engine’s power to devices (wheels, blades, etc.) and helps keep the crankshaft turning smoothly.


Cooling and Lubrication
Combustion and friction produce heat. Heat and friction — if not controlled — can quickly damage an engine’s components. Small gas engines are typically cooled by air. Friction is reduced using movable bearings and lubricants.
Air-Cooling Fins: For simplicity, most smaller gas engines are cooled by air. Metal fins around the outside of the combustion chamber help dissipate the internal heat.
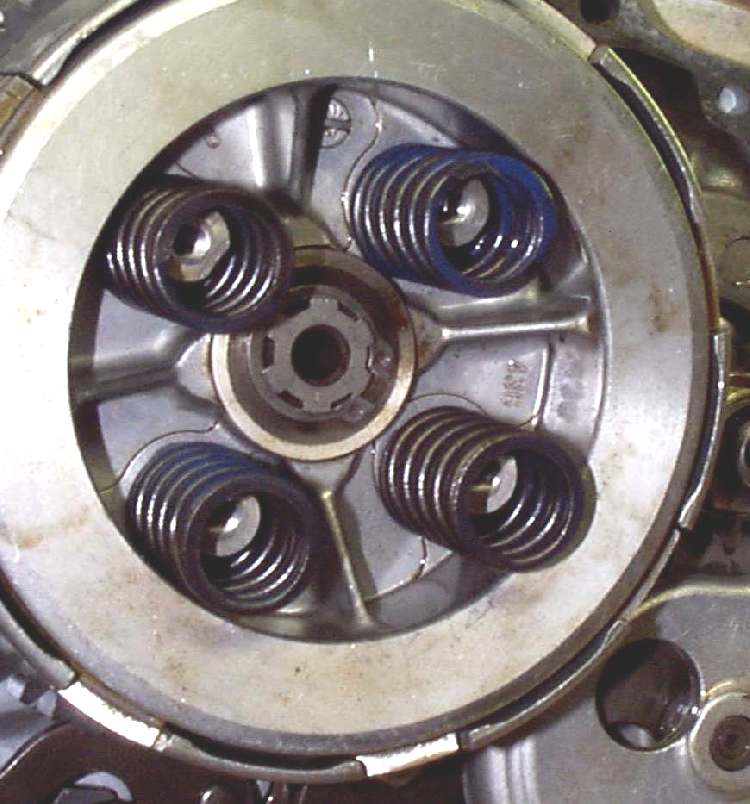
Friction: Friction is resistance that occurs when one surface rubs against another. Friction causes wear. In an engine with many moving parts, friction is reduced with bearings and lubricants.
Bearings: A bearing is a replaceable part that takes the brunt of the friction. A friction bearing relies on lubricants to minimize friction. A nonfriction bearing uses hard steel rollers or balls to prevent wear, though it too requires some lubrication.
Lubricants: Lubricants such as oil and grease reduce surface friction by coating parts with a film. Lubricants in two-stroke engines are applied to surfaces by mixing oil with fuel.
Viscosity: An oil’s viscosity is its resistance to flow. The thicker a lubricating oil or grease is, the higher its viscosity number.
Filters: Friction happens. Moving parts wear, even with the best lubricants. The resulting metal as well as carbon from the combustion process must be cleaned from the oil to ensure long lubrication. Some small engines use oil filters to remove contaminants from the circulating oil.
Regularly servicing your small engine will ultimately save you money and time. In the next section, we’ll review how, where, and when to service this engine.


The Benefits of Regular Small-Engine Maintenance

Purchasing a small engine-driven implement can make a dent in your budget. Tools and toys powered by small engines can cost anywhere from $100 to $10,000. That’s why it’s a good idea to invest in periodic servicing of your small engine. Replacing an engine every couple of years is an annoying and needless expense. Below we will review detailed information on how to service two-stroke gas engines. Following these procedures could help you put more money in the bank and less into your mechanic’s pocket.

Benefits of Regular Service

Servicing your small engine tool or toy on a regular basis offers many advantages over the Wait-Until-It-Breaks Maintenance Program.
  • By establishing a service schedule, you will gain confidence that whenever you need the unit it will be ready for use.
  • By performing a number of service functions together, you will save time. You can pick up all needed parts and lubricants in one trip to the parts store. Then you need to disassemble a component only once to perform numerous service procedures rather than taking it apart many times.
  • Regular service gives you a chance to visually inspect the entire engine and related components for damage, wear, and other potential problems.
How, Where, and When to Service Knowing how to service is as important as knowing when. Some service procedures can be performed wherever you store your tool or toy: in a garage, storage shed, or tool shed. If the unit is heavy, you can build a ramp up to a sturdy table that is at a handy height for working. Or you can use a ratchet winch to lift the engine. Units weighing less than 40 pounds may be lifted to a workbench or table as long as you lift with your legs rather than with your back. Get help if you need it, and make sure that the unit will remain sturdily in place as you service it. Remember to always put safety first!Servicing a small engine is easy once you know what to do and when to do it. A service chart can help you determine common service requirements as well as track what service has been done. Your engine-powered unit may have a service chart in the owner’s manual or service manual. Typical recommendations include changing engine oil every 25 hours of use and tuning up the engine at least once a year.The purpose of ongoing service, also known as preventive maintenance, is to keep your engine-driven tool or toy in good operating condition. Ongoing service procedures include air cleaner service, crankcase breather service, cooling system service, muffler service, lubrication, and tune-up.Lubrication service means making sure that all moving parts have sufficient lubrication (oil and/or grease) to minimize wear. Lubrication service procedures include mixing oil with fuel in two-stroke engines, and lubricating other moving parts.A tune-up consists of the adjustment and/or replacement of parts critical to smooth and efficient engine operation. Those parts include components in all engine systems: fuel, exhaust, ignition, combustion, cooling, and lubrication. Ignition tune-ups are more important for mechanical-breaker ignitions than they are for self-contained solid-state ignitions. Regular tune-ups will keep your small engine running smoothly and reduce the need for repairs.In addition, you should check other systems and make adjustments as needed to keep them operating smoothly. This includes adjusting the throttle, choke, and governor linkage, and cleaning off debris.Engine-driven tools and toys usually come with an owner’s manual. While some manufacturers’ manuals are more complete and better written than others, most manuals include basic information on safe operation and service. Unfortunately, product manuals are often written to reduce the manufacturer’s liability for accidental misuse rather than to help the owner service the product. In addition, manuals for engine-driven products typically show how to service the nonengine components: the grass catcher, wheel adjustments, blades, chains, and other parts. Service information for the engine may be minimal or nonexistent in the owner’s manual.
What can you do about this lack of information? Fortunately, there are numerous after-market publishers of service manuals for specific models of small engines. If you don’t have an owner’s manual, you can contact the manufacturer directly to purchase one; manufacturers also sell service manuals. Most manufacturers keep product manuals for up to 20 years. If they only have one original copy left, you can often request a photocopy for a small charge.
Knowing how to service the fuel system is an important part of caring for a small engine. Learn how to care for fuel filters, carburetors, and other major fuel system parts in the next section.

Enhanced by Zemanta

Four-Stroke Carburetors – Jetting

  Four-Stroke Carburetors


Your basic thumper carburetorYour engine is basically an air pump, and your carb meters how much air and fuel are sucked into that pump. Even though they may differ wildly in size, shape and design, all four-stroke carburetors have the same basic parts or circuits. Your slide cutaway (or throttle valve) needle and needle jet will all affect your bike’s acceleration from one-quarter to three-quarters throttle, and this is the most important area for off-road riders, since we spend the most time at these throttle settings. Due to the hassle of making changes to these circuits, these are the most neglected areas of tuning. Too rich jetting (too much cutaway, needle positions too high, too large a needle jet) can make your bike lunge and hard to control. If it’s too lean in this area, the bike will feel really flat and down on power, but will respond quickly to changes in throttle position. It may detonate (ping) under a load too. Pinging can also be caused by too little octane or winterized fuel (oxygenated, blended with additives), so keep in mind any fuel changes if your bike suddenly starts detonating in otherwise “normal” conditions.


Your main jet is probably the most talked-about circuit, and it’s as critical to get it right on a four-stroke as with a two-stroke. The main kicks in at half throttle and takes over metering duties as you hit full throttle. If your main is too rich, the bike will sputter and surge as it tries to burn all of that fuel. Too lean, and the bike will run flat or have a flat spot in the powerband. A severely lean main will cause your bike to seize just like a two-stroke. It’s better to be slightly rich on the main than slightly lean, because it will run cooler.


Yamaha’s new 400s have an accelerator-pump circuit. This system squirts a stream of raw fuel into the carb venturi every time you wick the throttle. Think of it as the four-stroke’s PowerJet carb – it richens the mixture to run best at lower engine speeds, yet allows a leaner top for more over-revs. If you radically modify your engine (flowed head, hot cam, etc.), you may have to richen this circuit slightly, but it’s otherwise not something you mess with for mere weather or altitude changes.


Your pilot jet (or slow jet) controls the idle circuit, or from zero to one-quarter throttle opening. The pilot jet and airscrew control the amount of fuel and air going into the engine at slow engine speeds. It’s very important to tune these circuits because they control throttle response and starting. The pilot circuit has a major affect on how well your four-stroke starts -or refuses to start – after a fall. At every event we attend, there is always some four-stroke rider who comes into the pits with his bike revving wildly. Invariably, this rider will say that his bike is hard to restart after a stall, so he turns up the idle adjuster so it won’t die.


That’s like jumping from the frying pan in to the fire. Thumpers are only hard to start when they are jetted poorly or when the wrong technique is used. The rider who turns up his idle is only perpetuating the myth about thumpers being hard to start. Most manuals (and this magazine) tell you that you should not touch the throttle when you kick a thumper. Well, turning the idle up is mechanically opening the throttle, right? You will make, your bike even harder to start. You have to fix the problem, not the symptoms of the problem!


General Carburetor Jetting Tricks
Your bike’s owner’s manual is a great source for recommended jetting and tuning tips. If you bought your thumper used and don’t gave a manual, get one. Set the idle speed as per your manual. If it won’t start easily using the manual’s technique, your pilot jet is the likely culprit.


Whether your bike is air or water cooled, you should start it and get it up to race temperature before tuning the pilot circuit. A hotter engine will run leaner than an old one, so failure to properly warm the bike will result in a too-rich setting. With the bike up to temp, adjust the airscrew so that the bike runs and responds best to slight throttle movements. Now, kill the motor and see how many turns out you have on the airscrew. Less than one, and your pilot is too lean. More than two, and it’s too rich. Install the next-size pilot and repeat the test.


Most off-road bikes are jetted lean to meet emissions standards, so you will likely want to richen these circuits, especially if you have gone to an after-market pipe, air filter or even removed OEM baffles (pipe and/or airbox). If you remove the muffler diffuser, you should toss the airbox stuffer too, or the airbox won’t be able to draw enough air to feed the engine. Most aftermarket companies will give you recommended jetting, so use this as a baseline.


Under most conditions, about the only time you will need to go leaner on an EPA-legal four-stroke is because of altitude. Air is thinner at higher altitudes, so it contains less oxygen, and your jetting will be too rich. You will want to go down a size on the pilot, one or two on the main and lower the needle a position (raise the clip).


Cold air is denser than warm air, so it holds more oxygen. On cold mornings, your jetting will be slightly rich, but thumpers are less susceptible to changes than two-strokes. Where you might change the pilot on a two-stroke when it’s really cold, an airscrew adjustment will suffice on a thumper.


The same is true for barometric pressure. As the barometer rises, the pressure compresses the air, and your jetting will be slightly lean. A falling barometer causes a rich condition, but thumpers don’t care about the weather as much as two-strokes.


Four-Stroke Carburetion Troubleshooting
Overall, the Yamaha YZ400F is jetted almost perfectly from the factory; however, it is very picky about its air filter. Do not over-oil the filter, and do not expect it to start immediately after oiling the filter. Let it sit overnight (not in the cold) to allow the carriers to evaporate. Better yet, keep spare filters in a plastic bag so that you never put a freshly oiled filter in the bike on race day. Modifications throw stock jetting out the window, so this troubleshooting guide will apply to the 400F as much as any other four-stroke.


Bike Won’t Start After a Crash
  • Pilot too lean
  • Idle set too high
  • Improper starting procedure
  • Bike wants hot-start button (KTMs and 400Fs)
Bike Runs-On or Won’t Idle Down When Throttle is Chopped
  • Idle set too high
  • Air leak in intake or engine
  • Pilot too rich (when bike is hot)
Bike Wont Start When Cold Temp Outside
  • Pilot jet too lean
  • Air filter over-oiled
  • Motor oil too thick for temperature

Bike Sputters / Wont Clean Out at High RPM
  • Main jet too rich
  • Air filter over-oiled
  • Spark plug has debris on electrode
Bike Coughs & Stalls in Slow Turns
  • Pilot jet too lean
  • Idle set too low
  • Valves set too tight
  • Decompressor is set too tight, so turning the bars engages release slightly
Bike Hesitates or Bogs Over Deep Whoops or G-Outs
  • Float level too low
  • Carb vent tubes blocked
  • Main jet splash shield not installed
  • Float level too high, gas is trapped in vent tunes (install T-vents)
Bike Starts But Wont Take Throttle Without Sputtering
  • Pilot jet too rich
  • Water in fuel
  • Debris in main jet
Bike Suddenly Starts Sputtering / Gas Flows from Vent Tubes
  • Stuck float check valve
  • Debris in gas or carb
Bike Runs Hot / Feels Slow & Flat on Straights
  • Main jet too lean
  • Fuel octane too low, causing detonation
Bike Coughs & Stalls When Throttle is Whacked Open
  • Needle too lean
  • Slide cutaway too lean
  • Pumper circuit blocked or too lean
Enhanced by Zemanta

Spoke Wheel Lacing


Adusting the Spokes.


I like Spoke Wheels. They just look good ! But, unfortunately, it seems looks is as far as anyone ever goes with wire spoke wheels. They need regular maintenance, but seldom get it. The problem with spokes and nipples is that they do, over a period of time, get loose. Lots of times no one notices that they are loose till they fail. A quick, down and dirty way of testing them is to just tap them. A loose spoke will have a dull sound, while a tight spoke will have a hi pitched, tinkly sound. Go try tapping some spokes and you will see what I mean.

Spoke Wrenches

If you have some loose spokes you will need to tighten them with a spoke wrench. Tighten the loose spoke until it has a nice ring to it. Now, you would think that all the spokes would need to have the same sound to have the same tightness, but this is not really true. Tap the spokes of a new bike with no miles on it and you will see they have different tones. New wheels are put together with nice new parts, special spoke torque wrenches, and people who actually know how to assemble wheels. I think we can safely assume that the new wheels are trued and torqued right, but the ones I’ve tried have different sounds. Very similar to be sure, but different. So I just tighten the loose ones till they have a nice ring to them, and leave it at that.


Sometimes we find a spoke has broken. Depending on which spoke has broken, you may be able to replace it. If not, you can tape or wire it to another spoke, or cut it out. I leave the old nipple in to fill the hole in the rim. Lots of dirt racers wire spokes together where they cross so if one breaks it will not wrap or flail around the wheel. One broken spoke is usually not much of a problem. Two is not so good, but as long as they are not close together you should be OK. Three means you had better deal with things real soon and if they are close together the wheel could fail very suddenly.

DO NOT RIDE THE BIKE IN THIS CONDITION.
So, we find our wheel has a bunch of broken spokes or a broken hub and things are not going well. We have several choices.
  1. Get a new wheel assembly. This is very expensive. I would do this only if the bike is very new and the wheel really trashed.
  2. Replace the broken spokes, rim, and/or hub. Then relace and true the wheel. This would seem to be the best way except for a couple of things.
    • The spoke nipples, on older bikes, often get rusted so tight to the spoke you can’t get them off without cutting the spoke.
    • The spoke nipples, on a high performance bike, can stretch the threads on the nipple and spoke. This can lock them together. This, in turn makes you cut all the spokes off. The spoke and nipple sets for some bikes only cost $30.00, which is not too bad. However, I know at least one high performance dirt racer who’s spokes cost almost $200.00 for the set.
  3. Get a used wheel. If you have an older bike, I think the best plan is to look for a used wheel at a motorcycle salvage yard. Check both the spokes, and the truing of the wheel before you buy the wheel and plan to replace the wheel bearings. The cost of the used wheel will be a lot less than going any other way.

Spoke Ends

If you must go the wheel relacing route, here are some things to remember. Count how many spokes there are, 36, 40, whatever. You must have the same number of spokes in the rim as in the hub (well, DUH !). The replacement spokes have to be of the right length, and gauge (diameter). The spokes have to have the right ends. That is, with no bend in the head, some bend, or a lot of bend. Straight spokes with no bend in the head are the strongest. Most spoke wheels do not use tubeless tires BUT, some DO, the spokes being off set in the rim, so there is an airtight seal. There are different thread pitches too, but as long as the spokes and nipples are the same, who cares, right ?

Four different spokes.

OK, we looked for a new wheel and found nothing. So we got a new rim or hub, got all our spoke nipples loosened, and are ready to do it to it. Now this is how I do it. I don’t do very many wheels so I find this way to work best for me. I tie each pair of spokes (Right and left sides together) together with some wire. I then take all the nipples off the spokes. I then take the rim off the spokes. I then cut the wire on one of the spoke pairs and remove the two spokes. Then I put them into the new hub, or replace them with new ones. I do this ‘cuse I aren’t too smart. I get confused easily. There can be as many as four different types of spokes on a wheel with a conical hub. Two different types of spoke ends and two different lengths. Most times there are just two different spoke types per wheel. I keep changing spoke pairs and rewiring them together till all the parts are replaced. If you are doing a lot of wheels and they are all the same, you will not have to do this. It will become second nature to you. But if you are only doing one wheel, this method will save you time and aggravation.

Getting the rim round.Spoke Tightening Pattern.

Now screw in the nipples the same amount on each spoke and finger tight. Take the assembled wheel and put it on the bike and tighten the axle. If it’s a rear wheel, adjust it like you would if you where adjusting the rear chain. Now comes the fun part. Truing the wheel. You wheel must be no more then two, onehunderths of an inch in out of roundness and side play. Set up a dial micrometer to measure out of roundness and side play. If it is a dirt bike wheel and it doesn’t go very fast and your not too picky, you can fix a piece of wire as a pointer, instead. Set the pointer of the micrometer so that it almost touches the inside of the rims. Now turn the wheel. You will see rim move up and down. Now here comes the tricky part. Locate the spoke (call it #1) that is at the highest point of the wheel. Tighten it a little. Then tighten four or five spokes (#s 2,3,4,5) on each side of that (#1) spoke. Tighten each one a little less as you get further from the highest (#1) spoke. If you tighten the highest (#1) spoke one turn then tighten the next spoke three quarter of a turn, the next half a turn, the next a quarter turn. Do this on either side of the highest (#1) spoke. Now turn the wheel, again find the highest spoke (point) and do it all over again. After a while the height of the highest point on the rim will get smaller and smaller. Soon you will be turning each spoke only a little bit. Once you are pretty close, and before the spokes are real tight, change and measure the side play.

Tighten Sopkes in Order.Rim side play.

Set the dial indicator point on the side of the rim, and spin the wheel. Pick the point of the rim that moves furthest to the right.Again tighten the nipple on the (call it #1) spoke at that point, however, make sure that that spoke (#1) goes to the opposite side of the hub. Now tighten every other spoke (#s 2,3,4), ahead and behind of that spoke (#1), decreasing the amount of the tightening on each spoke as you get further away from the first (#1) spoke. Make sure all the spokes you tighten go to the left side of the hub. This will pull the rim to the left. Spin the wheel again, find the high spot, or rather high side spot, and do it all again. You will need to keep measuring side play and out of roundness, back and forth, as you tighten the nipples. Also, remember to keep the rim centered in relationship to the swingarm or front fork tubes, depending on whether you are doing a rear or front wheel. When I say turn the #1 spoke on either side play or out-of-round one turn I don’t necessarily mean one turn. Use your head. You may need to turn it several turns OR only a half or quarter turn. Same with each of the other spokes before and after the #1 spoke. Turn them in proportion to the amount you turned the #1 spoke. Each one a little less than the one before it. #1 one turn, #2 half turn, #3 quarter turn, #4 one eighth turn, ETC. In some instances you might have to loosen or tighten the spoke nipples on the opposite side of the wheel to the ones you are working on, too.

Got it ? If you don’t completely understand, reread the above till you do. Do it wrong and with each adjustment things will get further and further out of kilter ! If things start going wrong, STOP. Try doing the OPPOSITE of what you were doing. If things are still going wrong, loosen all the spokes up and start over. DON’T just keep tightening things up and further out of whack. You can really bend up a rim by being bull headed and just driving on no matter what.
Take note, you may have to go back and loosen the nipples or tighten the nipples to get the rim to move into the right position. You may have to experiment a bit, before everything starts to come together. Go SLOW. Lots and lots of small adjustments is the trick.

You will want to have the rim centered, trued, and round before you get the spoke nipples real tight. This means no more that two, onehunderedths (2/100″) of an inch out of true, both side and out of round. Doing it better than that would not hurt anything, especially if you like going fast. Faster you go, the truer it needs to be. Once this is done, tighten up all the spokes about half a turn at a time. Keeping a sharp eye on all three things, center alignment, side movement and out-of-roundness, tighten the spokes till they make a nice crisp sound. If you happen to have a spoke torque wrench, use it now to set the right torque. Check everything one last time ands make sure the spokes do not protrude through the nipple, possibly putting a hole in the tube. If they stick through, grind them down.
Remember, this is the trick. If you want to get this done right and as quick as possible, GO SLOW. Try to do this fast and you will just screw things up and it will take forever to get it right. Lots of little, tiny adjustments. Hundreds of them. That’s the way to go.

Enhanced by Zemanta

Repairing a Manual Clutch


MANUAL CLUTCHES

Clutches come in a number of designs, but they all are made to do two things.
Help the motorcycle make a smooth start from a stationary position.
Ease the transition of going from one gear to another.
Clutches are basically round baskets filled with alternating fiber and steel plates held together, tightly, with springs. One set of plates, usually the steel ones, is connected to the transmission. The other set, usually the fiber plates, is connected to the engine. The clutch lever compresses the springs so the plates are not pressed tightly together. This allows the clutch to disengage. This works pretty well and most times clutch life is quite good. However, as the clutch wears, the plates get thinner. This lessens the spring pressure. In addition, if you slip the clutch a lot as you engage it you can burn the plates a bit. All this is not good for the clutch and sooner or later you are going to need new plates.

Most of the Japanese bikes have a wet plate clutch. This means the clutch runs in a bath of oil.
Dry plate clutches run dry with no oil. BMWs, some Harley-Davidsons, a few Japanese bikes, and others have dry clutches.

Repair is really quite simple. Remove the clutch cover, being careful to check for any washers from the kick starter that may stick to the inside of the clutch cover. Then loosen the nuts or bolts that hold and tension the clutch springs. Now remove the the clutch plates. On some clutches you pull the plates and the inner clutch basket as a unitafter removing the nut or circlip holding it on. On others, you remove an outer clutch plate/spring carrier and then pull out the plates individually. There may be large rubber rings or large flat spring like things between the plates. There might be only one or there could be one between every plate. Sometimes the steel plates have a sort of dished out edge on one side, for better oiling I guess. Each one is staggered from the one before it and the one after it. Be sure and put all the plates, o-rings, washers, etc. back in the same order you took them out. Measure the thickness of the fiber plates and compare that measurement to the one given in your shop manual. If they are too thin replace them. If you do not have the thickness measurement just look at them. Most times if they are worn out they will LOOK worn out and/or smell burnt. If they smell burnt, replace them. Even if they look and measure good. Turn them on edge, both fiber and steel plates. If they are bent replace them. Look at the inner and outer fingers. If they are damaged or worn, replace them. Look at the clutch basket. Inspect the grooves the clutch plate fingers slide into. Both inner and outer. if they are badly worn, consider replacing the clutch basket.

Take the new fiber plates and soak them in a pan of oil for an hour or two before assembly. If you are reusing the old plates you can just coat them with oil. Make sure that the outer clutch plate that carries the springs meshes right with the clutch basket. On some, they will only go in the right way, but on others the grooves will not line up right and this prevents the springs from pushing the plates together. Some clutches will have arrows that must match. Others won’t have anything… you just have to make sure they mesh up right.

Most clutches have the disengagement mechanism in the center of the clutch. Some activate it from the clutch cover and some use a rod going through the mainshaft of the transmission. This rod is activated by a cam or worm on one end of the rod, pushing the rod against the spring plate, releasing the clutch. This rod passes in front of the counter shaft sprocket and can easily be bent by small twigs and branches and gook thrown off by the rear chain. If you have this type and your clutch suddenly stops working, check here first for a bent clutch rod, before you tear the clutch apart. These rods can also be in two parts with a ball bearing between them. Some have a ball bearing only on the worm end. Don’t let that ball bearing fall out and get lost.

Sometimes, when a bike has been sitting a long time, like over winter, the clutch plates will stick together. You pull the clutch lever in but the plates will not disengage. About 60-70% of the time you can get them to release by running the bike up to 15-20 MPH and locking up the rear brake while you hold the clutch lever in (disengaged). If this does not break it loose, you will have to take the clutch cover off and with the lever held on, pry the plates apart with a screwdriver and reoil them a bit.

Remember, most engines have a flat metal shim on the kick starter shaft. Lots of times it will stick to the clutch cover when you pull it off. Make sure you put it back on the kick starter.

After everything is finished and the clutch cover back on, don’t forget to refill the engine with oil.

Some clutches, like the BMWs, Norton Commandos and some Harleys, have a single (or two) Heavy spring that is held in by a large circlip. These require a special tool to remove.

The BSAs and Triumphs require a special puller to get the clutch basket off.

All clutches must have a bit of free play in the cables and rods so the clutch springs can exert the maximum amount of pressure on the plates. If there is an adjustment screwon the rod, loosen the lock nut and tighten the screw until there is no more free play, then loosen it about 1/8 of a turn and tighten the lock nut. The adjustment screw can be right OR left thread, so watch out. A shop manual would be of help here. The adjusting screw can also be UNDER the clutch cover on the clutch spring plate. After you have made this adjustment, adjust the clutch cable keeping at least a little free play in the cable. Remember, on some bikes, the only adjustment is the free play of the clutch cable. Depending on the bike, the cable can be adjusted on both ends and in the center somewhere, only on both ends or only on one end.
source

Enhanced by Zemanta

cleaning engine airfilter

1. APPLY CLEANER

Liberally spray K&N Air Filter Cleaner onto both sides of filter and allow to soak for 10 minutes to loosen the dirt. Do not allow cleaner to dry on air filter. 

Panel Air Filter Cleaning Round Air Filter Cleaning Cone Air Filter Cleaning


2. RINSE FILTER
Rinse off air filter with cool low-pressure water applied to the clean side out in order to flush the dirt out of the filter. Continue to rinse the filter until all traces of cleaner are gone. It may be necessary to repeat steps 1 and 2. 

Panel Air Filter Rinsing Round Air Filter Rinsing Cone Air Filter Rinsing


3. DRY FILTER
After rinsing, gently shake off excess water and only allow filter to dry naturally. Do not oil until the filter is completely dry. 

4. OIL FILTER

A.) Squeeze Oil (99-5050)

Apply K&N Air Filter Oil evenly along the crown of each pleat. Allow oil to wick for approximately 20 minutes. Touch up any light areas on either side of filter until there is a uniform red color at all areas. 

Panel Air Filter Squeeze Bottle Oiling Round Air Filter Squeeze Bottle Oiling Cone Air Filter Squeeze Bottle Oiling


B.) Aerosol Oil (99-5000)

Spray K&N Air Filter Oil evenly along the crown of each pleat holding nozzle about 3″ away. Allow oil to wick for approximately 20 minutes. Touch up any light areas on either side of the filter until there is a uniform red color at all areas. 

Panel Air Filter Aerosol Oiling Round Air Filter Aerosol Oiling Cone Air Filter Aerosol Oiling


The above process is the only approved procedure for maintaining your K&N Air Filter.


Related articles 


Enhanced by Zemanta

Ignition Timing

Making changes to the ignition timing is one of the easiest ways to increase the power and efficiency of a four-stroke internal combustion engine and it has therefore become one of the first things an engine tuner will address. Ignition timing is a term that defines when the spark plug fires in relation to the piston‘s position within the cylinder. Without all of the knowledge that I’m about to give you, one would naturally assume that the spark plug should fire and ignite the air/fuel mixture when the piston is at the top of the cylinder and the air/fuel mixture is compressed as much as possible. At this point (referred to as Top Dead Center or TDC) the igniting air/fuel mixture will rapidly expand and push the piston back down, powering the engine. Unfortunately for all of us trying to tune our engines, there is one thing that prevents us from doing something so simple – it takes some time for the flame front to ignite the air/fuel mixture once the spark plug fires, therefore the spark plug must ignite a short time before TDC to achieve the desired result. It only takes a matter of milliseconds to burn the mixture in a cylinder under any circumstances, but when pistons are flying up and down at the rates they do in an engine, those milliseconds become critical. If the spark plug fires when the piston is at TDC, the piston may be well on its way down the cylinder by the time the air/fuel mixture is completely burned. To make matters even more difficult, there are a number of factors that can greatly affect the speed at which the mixture burns, including cylinder shape, mixture strength (lean or rich), type of fuel, compression ratio, how much air/fuel is in the cylinder, pressure, temperature, and humidity. Since cylinder shape, compression ratio, and the type of fuel are going to remain constant for an engine while it is being tuned, this article will concentrate on the remaining factors. Compression ratio is something that can be changed between tuning sessions, so one should know that an increase in compression ratio can be treated as a general increase in the cylinder pressure, which will be discussed in detail. The type of fuel used also greatly affects ignition timing, but it will only be briefly discussed here as a full discussion would double the size of this article. To learn more, see the link at the bottom.

The units most commonly used for ignition timing are degrees BTDC (Before TDC), with zero degrees BTDC meaning that the piston is at TDC when the spark plug fires. If the ignition timing is at 10o BTDC, then the spark plug fires when the crankshaft is rotated 10o before the piston is at TDC. If there is any number of positive degrees BTDC and the spark plug fires before the piston has reached TDC, then the timing is considered to be “advanced.” If the degrees are negative and the spark plug fires after the piston has reached TDC, then the timing is considered to be “retarded.” These two terms are also commonly used when making changes to the timing, as increasing the degrees BTDC is referred to as “advancing” the timing, and decreasing the degrees BTDC is referred to as “retarding” the timing. Engines usually have marks on the balancer or pulley that is attached to the end of the crankshaft and a mark(s) on the engine block. In order to determine an engine’s timing, a timing light is used. A typical timing light has an inductive pickup that clamps over the number one spark plug wire. When current passes through the wire and the spark plug fires, a signal is sent to the timing light, and the light flashes at the same time as the number one spark plug. The flashing light will appear to freeze the motion of the crankshaft, and the timing can be read with the marks. Normally, zeroo BTDC is when a mark on the balancer lines up with a mark on the block. Some engines have many marks on the balancer or the block indicating degree increments, but others have only one. When there is only one mark on each, an “advance” timing light must be used. This kind of timing light has a dial on it marked in degrees. One operates it by turning the dial until the two marks line up and then reading the degrees from the dial.

Now we get to the good stuff. In order to make the most power, the spark plug must fire at the right time so that the air/fuel mixture is completely burned at about the time when the piston reaches TDC so that the expanding gases can shove the piston back down. If the ignition happens too late, the expanding gases are shoving against something that has already moved away on its own and full power is not realized. If the ignition happens too early, the expanding gases are shoving against a piston that is moving towards them, and they will actually slow the piston down. If this condition occurs when one is starting the engine, one may experience “kick-back,” as the engine doesn’t yet have enough momentum and the starter motor isn’t strong enough to overcome the gases trying to push the pistons backwards. Once the engine is running, this overly-advanced condition may become evident with a “knocking” or “pinging” sound. Parts of the air/fuel mixture will autoignite (ignite on their own, with no spark plug firing) if enough pressure and/or heat is applied. If the spark happens too early in the cycle, the air/fuel mixture parts that are sensitive to autoignition can react (ignite) from the pressure created by sandwiching them between the rising piston below them and the flame front and corresponding shock wave from the burning air/fuel above them. This autoignition can create quite a shockwave of its own that is commonly heard as the “knock.” Unfortunately, this shockwave can damage and eventually destroy the engine if it happens too often. This condition is more prone to occur in high heat and the higher pressures caused by higher compression engines and by forced induction. Higher octane gasolines produce mixtures with air that are less likely to autoignite, so their use will lessen the likelihood of knocking and allow the engine tuner to advance the timing further.

Pre-ignition” is when the air/fuel mixture autoignites from excess heat and/or pressure before the spark plug has fired, and has little to do with the ignition timing. Unfortunately for the tuner and the customer, it can sound exactly the same as an autoignition from timing that is too advanced. Lowering the pressure and/or the heat in the combustion chamber will reduce the chances of pre-ignition. Lowering the pressure on a forced-induction engine is as simple as lowering the boost, but on a normally aspirated engine it may be as daunting as changing a head gasket to lower the compression ratio. Fortunately, pre-ignition may be caused by something as simple as a spark plug that is too “hot.” This heat range rating on the spark plug refers to its thermal conductivity and its ability to dissipate heat. A “hotter” plug will retain more heat in its tip and may stay hot enough to ignite the air/fuel mixture at an unwanted time. Therefore, “colder” plugs are desired when the pressure in a combustion chamber is increased. Care must be taken when choosing a heat range for spark plugs, as plugs that are too “cold” will result in poor starting and drivability.

As an engine speeds up, the spark plug should fire earlier (timing should be advanced) for the simple reason that there is less time for the combustion to happen as the piston speeds increase. The engine tuner’s job is to make that spark happen at just the right time throughout the rpm range. For those that want to get technical, it turns out that the spark should occur at a point so that the flame front travels through the mixture and burns it completely, and the heated, expanding combustion products reach a maximum pressure when the piston is about 15-20 degrees after TDC. With a dynamometer at his disposal, that job would be very easy if it weren’t for all of the variables mentioned earlier. Fortunately, the effect those variables have is very well understood and they can be accounted for if the engine has the right management system.

Under normal circumstances, pressure has the most significant effect on the ignition timing. When the pressure of the air/fuel mixture increases, the flame front travels through it much faster as the front has less space to jump when traveling from molecule to molecule since the molecules are closer together. The same can be said if more of the mixture is in the cylinder or if the temperature is lower, as cold air is more dense than warm air. An increase in humidity will also act like an increase in pressure as the extra water molecules will help bridge the gaps between the air molecules, increasing the speed the flame front can travel. Since an increase in pressure results in a decreased combustion time, the ignition timing must be retarded as the pressure increases to avoid knocking. As far as what makes the pressure change – the cylinder pressure increases as the load on the engine increases and/or if forced induction (turbocharger, supercharger) is used. When an engine is idling or under light load and there is little pressure, the ignition timing may be advanced. Once the engine experiences a load or forced induction kicks in and the pressure builds, the timing must be retarded.

Since measuring the pressure inside the actual cylinder would be highly impractical, engine management systems use the intake manifold pressure. Newer vehicles have what is known as a Manifold Absolute Pressure (MAP) gauge or sensor. The absolute pressure measurement has the normal atmospheric pressure (14.7 psi or 1 bar) factored out of it, so a full vacuum would read zero and normal, sea-level atmospheric pressure would read 14.7 psi on an absolute pressure gauge. In the engineering world, this differs from gauge pressure which really measures the difference between atmospheric pressure and the thing that one is measuring. For example, your fuel pressure would be read in gauge pressure, and the units would technically be “psig” as opposed to “psia.” If the fuel pressure was 30 psi (psig), it would actually be 30 psi over atmospheric pressure. An absolute pressure measurement is used instead of gauge pressure so that the vehicle’s management system may include the surrounding barometric pressure and know what the “real” pressure inside the manifold is.

Newer vehicles have sophisticated electronic management systems that control everything that happens within the engine and even some things that happen outside of it. These systems are commonly referred to as “Engine Control Units” or ECU’s. For those with such a system, tuning the engine becomes a matter of electronics and computer software. The distributor has disappeared, and multiple coils, sometimes one for each spark plug, have taken its place. Through the use of sensors such as the MAP sensor, the Mass Air Flow (MAF) sensor, and the crankshaft position sensor, the ECU can monitor all of the variables within the engine along with the environmental conditions, and tell each spark plug exactly when to fire. If one has such a vehicle with an ECU that is not programmable and can not be changed with the addition of a chip, then one is going to be very limited when it comes to tuning. If one is fortunate enough to have a fully programmable ECU, then one may change the ignition timing and possibly many other things as well until one has gone absolutely insane. Many non-programmable ECU’s can be reprogrammed, or “re-flashed” with new programs, and others can accept aftermarket add-on chips that change the programs. One may have to perform a little research to determine what type of ECU is in the vehicle.

Older vehicles with distributors can be much simpler to tune (sometimes.) Besides the timing light and a wrench, no fancy equipment or computer knowledge is necessary. Way back in the day before crank position sensors, ECU’s, and individual coil-packs, the distributor was used to determine when each spark plug should fire. The distributor can be a very simple device, consisting of a rotor and a cap. Through the use of chains and gears, the rotor spins at the same speed as the crankshaft. Inside the cap are “points,” which are small metal tabs. There is one point for each spark plug, and the rotor periodically touches the points as it spins. The rotor is connected through a high voltage coil to the battery, and the points are connected via spark plug wires to the spark plugs. As the rotor spins, it contacts the points, completing the electrical circuit and sending short-duration, high-voltage currents to each spark plug, hopefully in the correct order. Changing the ignition timing can be done by simply twisting the cap in relation to the rotor so that the points are touched a little sooner or a little later. Unfortunately, this changes only the “static” timing, which is the ignition timing that the engine will see throughout its entire rpm range if no other timing devices are used. If no other timing devices are used, then the timing can not change along with the pressure, rpm, and all of those other variables, and it will be impossible for the engine to operate at peak power and efficiency over the broad range that it must during every day driving. For racers that operate in a very narrow range, static-only timing may be sufficient.

Fortunately for everyone else, the automotive engineers way back in the day really knew what they were doing, and they came up with two devices that allow the engine to operate with greater power and efficiency over a very broad range. The two variables that have the greatest impact on timing, rpm and pressure, are taken into account with the “mechanical (or centrifugal) advance” and the “vacuum advance” devices. Using the same principal that keeps water in a bucket when one swings it around in a circle, the mechanical advance consists of weights on springs that move away from a spinning shaft. The weights are attached to some other moveable parts and levers that will create the same twisting action between the rotor and the cap as changing the static timing by hand. As the engine rpm increases, the weights move further out, changing the rotor-cap relation further. As stated earlier, an rpm increase should advance the timing, so the mechanical advance device is used to advance the timing as the engine’s rpm increases. The device used to factor in the pressure in the cylinder is the vacuum advance. It is a device that creates the same result as the mechanical advance, but it does so in response to a low-pressure situation in the intake manifold. Under low-load conditions the air rushing through the manifold creates a partial vacuum (negative readings on a psig gauge, readings below normal atmospheric pressure on a psia or MAP gauge) and the device advances the timing. As the load increases and the pressure increases, the vacuum advance will allow the rotor-cap relation to spring back, retarding the timing. When one wants to tune using these devices, one can simply adjust the static timing and allow the devices to perform their functions. If one wants to change the amount of timing that is advanced and the points at which the advances are made, one can replace the springs and/or weights within the mechanical advance and use an adjustable vacuum advance and/or change the location where it senses the vacuum in the manifold.

If you’re looking for me to tell you where to set the timing – this articles is too long as it is. Every engine is different, and timing is going to vary from as little as 8 degrees BTDC to over 40. With a little research, one can find out a good starting point for the ignition timing. Fine tuning should be done on a dyno or under controlled conditions at the track.

To summarize:

1. Ignition timing is a way to describe when the spark plug fires in relation to the piston’s position and is measured in degrees BTDC.

2. The ignition timing must take into account the fact that it takes time for the air/fuel mixture to burn.

3. The ignition timing should advance as the engine rpm increases.

4. The ignition timing should retard as pressure in the cylinder (as measured in the intake manifold) increases.

5. Every engine is different, and it’s the engine tuner’s job to take these factors into account (and a few others) when setting the ignition timing.

Gasoline has a significant effect on all of this stuff I just described. If you want to learn just about everything there is to know about gasoline in one place in a language that’s easy to understand, please read: source

Enhanced by Zemanta

How to clean Your Helmet -DO-IT-YOURSELF


Whether you’re a new or experienced rider, chances are you’re going to have a smelly/dirty helmet after all the motorcycle riding you’ve done. A lotta people ask how to clean lids inside and out, and although there are a lotta different methods and suggestions, I’ve compiled the most effective ways to do so. (Plus there wasn’t a how to on this anyway, so I hope it helps)

If you own a helmet with a removable interior lining, then you pretty much have it made. You remove the lining and/or the cheekpads and throw them in the laundry machine at delicate cycle, while that is washing, you can clean the outside of the helmet with a soft cloth/towel/micro fiber and mild detergent. Moisten the soft cloth/towel/micro fiber, put a few drops of mild detergent on it, and wipe the shell gently, the detergent will do it’s job with the grime/dirt/etc and after you’re done, you simply wipe off with water until the detergent is gone. You’ll be left with a shiny clean OIL FREE shell.

BUT for those of us with helmets that do NOT have a removable liner.. the job is a little trickier. Skin oil and sweat builds up and all the “spray cleaners” just don’t quite cut it. I’ve tried helmet fresh and all it did was make it smell better, and I’ve tried Motorex Helmet Care Spray, which yielded same results, all fragrance, minimal cleaning effect (on the lining).

Follow these steps if your helmet doesn’t have a removable liner and smells like poop.

Step 1

Buy a helmet to clean if you don’t already own one unless you want a how to: stitch your own head/scalp/face up thread.

Step 2

Remove the cheekpads, breath guard, visor, etc.

Step 3


Grab some shampoo. If it’s good enough for your head, it’s good enough for your helmet. Dish detergent might be a bit harsh for the interior, so avoid that.
Don’t overdo it, but don’t be cheap with it. If your helmet REALLY smells, then go ahead and put some more.

Step 4

Fill with lukewarm water. I have a feeling cold and hot might be a bad idea, stay away from the extremes.

Step 5

Rinse to agitate the excessive dust/dirt out, you don’t want to dunk it in the CLEAN water and scrub with the same contaminated water.

Step 6

NOW dunk it in and douse that mofo in cleanliness.
Get it all up in there.

Step 7

Gently massage the lining so the shampoo works its magic.

Step 8

Rinse out all the shampoo thoroughly.

Step 9

Pat dry the exterior to avoid water spots and let it air dry. If you live someplace humid or extremely hot, you may want to place it in a cool DRY place with a fan blowing it or something. Look at the shine!


Special offers parts/accessories